Showing posts with label recipe. Show all posts

Wednesday, March 6, 2013

Lemon Apricot Pasta With Chicken and Broccoli

I decided to experiment for dinner tonight, and it was insanely delicious. I had plans to make lemon pasta for myself, and I had all the ingredients on hand. I popped over to Waitrose on my home though so I could get some chicken to go with my pasta, and while there inspiration struck. I had already decided to get some broccoli for future macaroni and cheese recipes, and thought that it would go well with my lemon chicken pasta tonight. Then I headed over to the cheese section to see what might be good on top, and discovered Yorkshire Wensleydale cheese with apricot chunks. I love apricot, and I thought that lemon and apricot sounded like a good flavor combination, so I decided to give it a go.
Lemon apricot pasta with chicken and broccoli
 The end result tonight was a wheat spaghetti with a light lemon cream sauce, capers, broccoli, chicken, and the apricot cheese crumbled on top. It was absolutely fantastic; just the right mix of sweet, tart, and creamy. Plus it was very filling, so I have leftovers for lunch tomorrow! A win all around.

So, here's how I made my fantastic dinner tonight!

Ingredients:
Pasta of choice (I had wheat spaghetti on hand, but I'm always a fan of angel hair when it comes to lemon sauces)
Chicken breast (I had two, so I decided to cook two as I don't have a freezer)
Broccoli
Laughing cow cheese (2 wedges for the sauce)
Wensleydale cheese with apricot (you can substitute here if you need; go with any soft, crumbly, mild cheese and chop apricot -- fresh or dried, your choice)
Lemon juice (1 tablespoon -- more or less to your own tastes)
Olive oil
Salt, pepper, garlic, and rosemary for flavor

First, get a pot of water boiling and cook the pasta normally. I like to boil water with salt and olive oil in it, personally. Meanwhile, wash and chop your broccoli (and enjoy Dana Carvey choppin' broccoli while you're at it). Then add the broccoli to your boiling water to cook it a little bit (I did this, then later added it to my cooked chicken...you can save the broccoli to cook with the chicken if you prefer, stir-fry style. Whatever flavor you want, and however you want the broccoli cooked).

Anyway, I started cooking my chicken at this point. Rinse the chicken breast(s), and cut it up into bit-size squares. Or strips, however you want to eat your chicken with your pasta. I like bite-size chicken because it cooks faster, and it's easier to eat when everything is done. Anyway, I cooked my chicken in olive oil with salt, pepper, garlic, and rosemary for flavor. Cook until the chicken is turning golden-brown and there is no pink.

Drain the pasta as normal, and set aside while you mix your sauce. The sauce is simple; pour a bit of olive oil into the pot (I eyeball, usually enough to cover the bottom of the pot), and put a wedge of Laughing Cow cheese in to melt. Add the lemon juice, and once that's nicely mixed up, put the other wedge of cheese in. Add water as necessary to help the consistency of the sauce. I wanted it to be a little more liquidy than creamy. I didn't put much water in, though. Anyway, stir it all up nicely until you have a smooth sauce. I don't have a whisk, which I'm sure would have simplified the job. A spoon worked well, though. Add the pasta back to the sauce, and stir.

Finally, add the chicken and broccoli to the pasta and mix a bit to get sauce on that. Dish a helping into a bowl or on a plate, and crumble some cheese and apricots on top. I also sprinkled a little more garlic and rosemary on top. That's it! You have an easy, healthy, filling, flavorful dinner! Bon apetit!

Saturday, March 2, 2013

Pesto Mac 'n' Cheese

Mmmmm. I love pesto sauce. And I love macaroni and cheese. I don't even mind cooking dinner for myself if it means combining those two delicious things. Recently, I found some pesto at the Little Waitrose down the street, and I couldn't pass it up. I should probably look into making my own pesto, but for now, let's go with what I've got. Anyway, after a busy day of homework and traipsing around London (in very touristy places that were overrun by slow tourists who like to stand in the way looking confused), I decided to treat myself with some pesto macaroni and cheese. However, the way I tend to operate in the kitchen is I think of something that sounds good, and I just experiment. So that's what I did tonight. I found a good start for my sauce, and I think future experiments will improve on it.

Here's what I used:
Pesto
Laughing Cow cheese (you know I'm addicted to it)
Grated parmesan cheese
Shredded cheddar cheese
Skim milk
Pepper
Noodles of choice

First, get a pot of water boiling to cook the pasta. I always like to add olive oil and salt to my boiling water. Once it's up to a boil, cook the pasta according to the directions, until al dente. I usually just let it go to town; when you cook as much pasta as me, you can eyeball when it's ready!

While that's going, get a smaller pot for your sauce. I stuck a wedge of laughing cow cheese in the pot over low heat to let it start melting. I put in about 1/4 cup of the pesto sauce, and stirred. You should probably grate your cheese prior to making the sauce, but I decided to just shred right over the pot and occasionally stir it in. Put however much cheese you'd like in; you already have a great consistency with the pesto sauce, you're just adding cheese for flavor. In my case, I'm addicted to cheese, so I put probably 1/2 a cup in total.

Depending on the consistency of the sauce, add a bit of milk in. You may opt for no milk, which is fine. Be careful not to put too much in, as it can cause the cheese and milk to separate. Anyway, this is something I can improve on next time; like, say, starting with a traditional cheese sauce and adding pesto to it.

I sprinkled in some pepper, and let the sauce sit on the lowest heat setting possible while I drained the pasta. Then fold the pasta into the sauce, and you're ready to go! I meant to top it all with some rosemary garlic breadcrumbs, but forgot because I was hungry and it looked good.

Pesto mac 'n' cheese
If it's green, it counts as a vegetable, right?
The end result? It certainly could have been prepared in a better way, but it tasted phenomenal. Pesto and mac 'n' cheese really ought to be combined more often.

Here are some things I would recommend experimenting with, and things I will probably try in the future (when I have them on hand):

Smoked cheese (I usually go gouda, but any cheese with a smokey flavor really adds to mac 'n' cheese)
JalapeƱos
Cottage cheese for a moister mix (this is best for baked mac 'n' cheese)
Broccoli

Update: I re-made this tonight (March 3rd) and it was fantastic!

Tonight, I used two wedges of Laughing cow instead of one, and didn't use any milk or cheddar cheese. I added some lemon juice to it however, which gives the sauce a wonderful tang along with the other flavors. Put however much parmesan cheese in as you fancy, sprinkle some garlic and rosemary in, and prepare for a quick, easy, and delicious meal!

Any other suggestions or ideas to try? Feel free to leave suggestions in the comments!

Thursday, February 14, 2013

Culinary Adventures: Do the Mashed Potato!

Or do the watusi, whatever strikes your fancy.

On Tuesday, I decided to cook dinner using my new kitchen supplies that had finally shown up (and I had finally bothered to wash! Yay me!). I happened to have some potatoes (that I had initially planned to bake), and a potato-masher-utensil thing (I don't know if it has an actual name, but here is a nifty picture of the tool). Here's the catch though: I had never made mashed potatoes in my life, and therefor wasn't sure if there was a special trick to it or anything (inside secret: there is no special trick).

Sliced potatoes in pot
Slice the potatoes and let them simmer in the pot.
Anyway, I Googled around for some recipes and they all followed the same format (like I said: no special trick), so I decided to just go for it. So first I peeled my potatoes. Peeled some carrots too while I was at it, figuring some carrots would be nice. Then I chopped my potatoes into chunks, averaging between half an inch to an inch and a half in width. And I plopped those suckers into a pot of cold water, which I placed on the stove and allowed to simmer.

Meanwhile, I started boiling water in another pot so I could make spaghetti and try out this recipe for Laughing Cow alfredo sauce. It should be well-known by now that I am flat-out obsessed with Laughing Cow cheese, and I like making pasta and experimenting with my own home-made sauces, so it was a no-brainer.

As everything was now sitting on the stove taking its sweet time, I began chopping up my carrots. I documented this part of the process for no reason, but now it's documented, so I obviously must include a mention of it.
Chopped carrots
*Time elapse*

I let the potatoes continue to cook for quite a while, just to ensure they were nice and soft and ready for mashing. Meanwhile, I cooked the spaghetti as normal, and drained it out. Then I began making the sauce. By this point, it was getting late in the evening and I was getting hungry and impatient, so I actually didn't consult the recipe at all. I did what I do best: winged it (wung it?).

In my still-hot pot, I poured some milk in (eyeballing, of course, an amount that felt appropriate for one person. I also don't have measuring cups, so eyeballing felt like a good course of action. It was maybe 1/3 cup of milk). I stuck a slice of butter in (maybe 1/4 tablespoon?), shredded some English cheddar over the pot, and added two wedges of light Laughing Cow swiss cheese. Sprinkled on some black pepper and stirred. I think it was a little too much milk, as it was runny and never did quite thicken, but at least it wasn't too much sauce in general for my single portion of pasta. Anyway, the flavor was smooth and creamy. I was contemplating adding lemon juice, but didn't as I also wound up making a salad with vinegar for dressing. I would certainly recommend adding whatever spices you enjoy to compliment it (or at least adding garlic like the original recipe calls for) but once again, I am limited on supplies. Let's all pretend I don't live above a grocery store right now.

Mashing potatoes
How to properly use a potato masher.
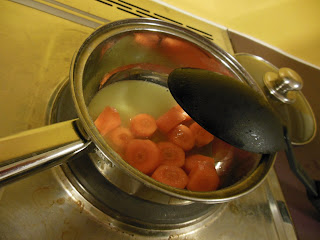
Now, back to the veggies. I decided the potatoes had been simmering away long enough, so I drained those suckers and put them on my cutting board. Meanwhile, I decided to cook the carrots a little bit in the potato pot with some butter and olive oil. I did this mainly because raw carrots are difficult for my stomach to process. I pulled out my hand-dandy-nifty potato-mashing tool and did precisely what I thought I should do -- and low and behold, it worked! The potatoes mashed easily. Success!


Carrots cooking in potSo after giving the carrots about 10 minutes to cook a teensy bit (they certainly weren't soft or mushy), I replaced the carrots with the potatoes in the pot, where I added some milk, some laughing cow cheese, some butter, and a little bit of shredded cheese. I managed to forget salt and pepper, which is a rooky mistake. Ah well. The good news is, my potatoes came out nicely mashed and creamy, as any decent mash should. Turns out, they're so easy to make even I can do it. That's reassurance you can count on.


Pasta, salad, and veggies for dinner
My final dinner consisting of spaghetti with Alfredo, mash, carrots, and salad.

Sunday, January 27, 2013

50 Weeks of Creativity: Week Two

So, for the second week of creativity, I was very busy getting ready to leave for London. I did experiment a few times in the kitchen. We had left-over homemade tomato sauce, and some pepperoni slices as well, so I felt like making some pizza bagels one day. Talk about a quick, easy, and tasty snack!

First things first, I pre-heated the oven to 350 degrees and let that get going while I set up my pizza bagels. I used a non-stick pan, which doesn't require any kind of greasing down (you actually shouldn't use anything unless you like a nice big mess).

I used bagel thins, which I think are the greatest thing ever, mozzarella cheese (when I remade these pizza bagels later, I mixed in some smoked gouda and gruyere as well, along with some seasoning), homemade tomato sauce, and pepperoni slices.

Lay out however many bagels you wish to make on a baking tray. Then, using a small spoon, put some tomato sauce on the bagel. Put however much or little as you wish. Next, sprinkle cheese on over that. Try not to get cheese on the baking tray, as this will make clean up easier later. I found that holding the bagel thin over the plate or container of cheese helps; that way, any cheese not staying on the bagel falls back into the cheese. Anyway, I like to put a light covering of cheese on first.

Next, place pepperoni slices around the bagel. I would say place anywhere from 4 to 6 slices, depending on how much pepperoni you want. Then, top with a bit more cheese. I personally love cheese, so I like to nearly hide the pepperoni with cheese.

Once you're ready to go, pop them in the oven. They don't take long to cook; literally less than 5 minutes. I never bothered to actually time, I just stayed in the kitchen and peeked in periodically. When the cheese is melty on top, they're good to go.

The end result is a soft bagel with pizza on top. The homemade tomato sauce I used was delicious; the tomatos had come from my mom's garden and were incredibly sweet. These can also be made with Laughing Cow cheese in place of tomato sauce for a lighter flavor.

I also took some pictures in Seattle with Erica, Zoe, and the Fremont Troll on Saturday, but I can't seem to find my pictures from that day, so I guess this recipe will have to be it for the week in creativity.

Sunday, October 21, 2012

Eggcellent Pizza

About a week or so ago, I used up my last pizza crust and made egg pizza. I had a craving for eggs and I decided I wanted to try them on a pizza. It was easy, and the leftovers made for a good breakfast.


So I laid out the pizza crust and spread a little olive oil over the base. In a bowl, I mixed together six eggs which I then poured over the pizza. Don't worry if your eggs extend beyond the crust onto the pan; they'll cook together like a quiche and stay with the rest of the pizza.

Then I sprinkled freshly shredded mozzarella over the eggs. I would suggest you go parmesan instead of mozzarella, but I didn't have any parmesan on hand. Next I salted and peppered the pizza. Lastly, I put some broccoli and spinach over the pizza, and popped it in the oven at 400 degrees for about 15 minutes. When it starts to turn golden-brown around the edges, it's ready to go.

The end result was a lot like a quiche, which a tasty, buttery crust underneath the egg. You can refrigerate any leftover pizza, and it reheats in the morning for a delicious breakfast you can have on the go. Definitely a keeper, and a great way to get rid of eggs before they go bad.


Tuesday, October 9, 2012

Beet Pizza

A couple days ago, I experimented with beet pizza. I had bought some pickled canned beets and thought it'd be interesting on a pizza.

So I started cooking some chicken, which I cooked with Philadelphia's lemon and herb cooking creme and some rosemary and basil.

As the chicken was cooking, I started prepping the pizza. I took some of the beet juice from the can and mixed it with some of the lemon and herb cooking creme for my pizza sauce. I spread this along the dough, then added some chunks of mozzarella cheese. Over this, I spread my chicken and some spinach, plus some chopped up beets. Then I popped it all in the oven and baked for about 15 minutes.

The end result looked a bit like a normal pizza, with a red sauce and nice big chunks of melted cheese. The taste was unique but delicious, with the beets providing a subtle sweetness. I could've used less spice in the sauce, as it created a taste that at times was a bit jarring. All in all though, beet pizza proved to be a unique take on pizza!

Thursday, October 4, 2012

Chicken Noodle Soup (For the Graduate Student Who Doesn't Want to Starve)

Last week, I was telling my mom that Progresso's Light Chicken Noodle soup was pretty good, and she suggested that I actually just make my own chicken noodle soup, so I'd know what all went in to it. So I did.

I acquired all the necessary ingredients, such as chicken (I bought chicken tenders so I could just cut them up and cook them), carrots, celery, chicken broth, and of course noodles. I love egg noodles but couldn't figure out where to find them at the local Kroger, so I bought some little round noodles called ditalini. (Of course, when I started making the soup I nearly forgot about the noodles altogether, so everything was ready to go except for the pasta)

So anyway, tonight I made my soup. I started with the chicken, which I cut up into chunks and tossed in a pot with some olive oil, rosemary, and basil. While in the pot, I put some salt and pepper on the chicken. Then I stirred it all around and let the chicken cook itself through. Easy.


Here's the chicken, nearly ready to be put in the soup. It already smelled great!

Meanwhile, I poured all of my Swanson's chicken broth into a large pot and got that going. Once the chicken was ready, I put it right into the broth. Added some more rosemary, basil, salt and pepper, and then started on the vegetables. I washed some celery stocks and carrots sticks, peeled the carrots, and chopped everything up to add to the soup.

Everything was looking good and I was getting ready to call it quits when I realized I was missing the noodle part of my chicken noodle soup. So I cooked up the pasta and added it to the mix and called it good.


The carrots and chicken sunk to the bottom, but everything is good to go...I thought.

I did notice that by not pre-cooking the vegetables, they are still fairly crunchy in the soup. If you like that, go for it. If you prefer mushier veggies in a soup, however, definitely cook the vegetables prior to adding them to the soup. Anyway, the flavor is rich and delicious, especially the chicken which has nice seasoning due to being cooked with the spices.

This dinner was a bit more time-intensive, but the wonderful thing about making my own soup is that I'm guaranteed to have the things I like in it; the chicken was cut in a way so as to get rid of any fat or gristle that I refuse to eat (I often throw away chicken in soup if it "looks funny"). Plus, by making an entire pot, I still have quite a bit of soup left over, which I can now freeze for future use. Another culinary success.


Bon apetit!

Monday, October 1, 2012

Healthy Pizza

Saturday night, a group of girls from the Arts Administration masters program got together for a pizza night. We watched TV shows about ghost hunters and Nazis, made pizza, drank wine and beer, and just had a good time hanging out together. I'm a pretty big fan of pizzas, but I can't eat many of the traditional staples of a pizza. So tonight for dinner, I decided to explore some healthier pizza options to meet both my dietary needs and my picky eating habits.


I made a broccoli spinach pizza with an olive oil sauce for myself. It was very tasty, and incredibly easy to make.

I started with Pillsbury thin pizza crust, because I don't like too much crust. It's all about the cheese and toppings for me! You simply spray a cookie sheet and unroll the crust. It's rectangular in shape, not circular, but that tends to work better for thin crusts anyway. The directions state that if you want a crispy crust, bake it for 5 minutes before adding toppings to it. For softer crust, don't. I opted for a midway point and popped mine in for about 3 minutes.

Next, the sauce. I'm not a fan of red sauces because the tomatos are hard on my stomach, and white sauces are often too fatty because of all the cream. So I made my own sauce; I mixed together olive oil, rosemary, thyme, and half a spoonful of my tried and true Philadelphia cooking creme (the reduced fat Italian Cheese & Herb variety, as usual). I whisked this all together so it was a consistent texture and then drizzled it over the pizza dough. You can use the back of a spoon, a spatula, or one of those nifty little brushes to ensure the sauce covers the entire pizza.

Then, the cheese! For the sake of ease and time, I opted for pre-shredded cheese. I used an Italian blend, which consisted of mozzarella, provolone  and parmesan cheeses. Of course, I'm always a fan of freshly shredded cheese, so if you have some on hand, definitely shred it yourself and go for stronger, fresher flavor!


My pizza mid-process; it's got sauce, cheese and broccoli so far.

I chopped up some broccoli heads and spinach leaves which I sprinkled across the top of the pizza, then added more cheese on top. Pop the whole thing in the oven following the instructions on the dough package (I baked it for 13 minutes at 400 degrees) and it's golden. While cooling, I sprinkled some additional rosemary on top for a little added flavor.


The finished product; golden around the edges without being burnt!

The end result was flavorful and filling; definitely something I'll have to hold on to and try again. The crust is a tiny bit sweet yet savory, and the rosemary and thyme complemented the cheese and greens. In the future, I may contemplate adding black olives, artichoke hearts, or chicken. I probably spent 20 minutes making dinner tonight, and used barely any dishes. Plus, I ate some veggies! I paired mine with some moscato (and some peach iced tea Crystal Light after my glass was empty) and watched some Wilfred on Netflix. Night: success.

Saturday, September 22, 2012

Big Girl Cooking (And Other Anomalies of Growing Up)

For the first time ever, I am living somewhere on my own where I am wholly responsible for...everything. I am renting an apartment in a renovated Victorian in midtown Savannah where I pay rent and help split a water bill, electricity bill, and internet bill (we've opted not to pay for cable). That's all fine and dandy, but it also means that I am suddenly responsible for every single meal, every single day. Prior to returning to Savannah for this school year, I made a decision to try to eat healthier and exercise more, in an attempt to combat some bad habits I've formed recently. As eating out isn't very friendly to that decision or to my wallet, I've had to figure out how to feed myself from the grocery store, which is an interesting task when the only things I ever make in a kitchen are macaroni and cheese or cupcakes.

But I recently found this recipe for Creamy Scrambled Eggs via Laughing Cow as I was contemplating cooking some scrambled eggs with Laughing Cow cheese in them. The recipe inspired me to go ahead and try my initial thought...with some revisions. The end result was tasty, filling, and healthier than you might think, so I figured I'd share it on my blog, even if for no purpose other than having it for my own future reference.

Using the aforementioned recipe as a starter, I whisked together three eggs (they were even cage free, grain-fed eggs). I added a dab of French's Dijon mustard with chardonnay, and then decided to put about half a spoonful of Philadelphia's reduced fat Italian cheese and herb cooking creme. I've been pretty enamored lately of the cooking creme; I usually add it to my macaroni and cheese. I skipped the pepper suggestion on account of the fact that I had no pepper on hand (it's on our shopping list).

While I was mixing these ingredients together, I had a pan going on low heat where I had a dab of butter melting. I always like to grease the pan with a little butter and a little olive oil before scrambling eggs; it helps with the cleanup later and adds a nice flavor to the eggs.

I poured the egg mixture into the pan and let it start cooking, then I pulled out my fantastic Thomas' cinnamon raisin flavored bagel thins, which I popped in the toaster for my preferred degree of toastiness (for me, that's basically just warm). Then I spread half a wedge of the Laughing Cow cream cheese on my bagel. Laughing Cow is amazing; it's lighter and healthier than regular old cream cheese, but tastes just as delicious. The remaining half of the wedge I threw in to my scrambled eggs, which were about half cooked at this time. I mixed the cheese in and let it melt in with the eggs, taking my eggs of the stove once they were fully cooked but still a smidgen goopy. Cover your bagel with eggs and you have a delicious meal, prepared in minutes.

The end result was creamy and flavorful; I especially liked the raisins in the bagels, which would occasionally produce a sweet tone to compliment the savory flavors in the eggs. This experiment was definitely a keeper. I ate my meal while watching Doctor Who.

Now if only I could figure out how to cook meat that doesn't come in a frozen meal...